Configure and Launch a Cloud Server at AWS for Free up to 1 Year (in 2024)
Abstract
Hi everyone. Thank you for tuning in. Using an AWS EC2 instance as the Cloud Server comes with many benefits. It provides full control over the server just like your Personal Computer. It is also easily scalable (within minutes) in terms of computational capacity. AWS also provides useful dashboards for performance monitoring and optimization of the EC2 instances and EBS volumes. In this post we will discuss how to Configure and Launch a Cloud Server at AWS (using EC2 and EBS services) for Free up to 1 Year.
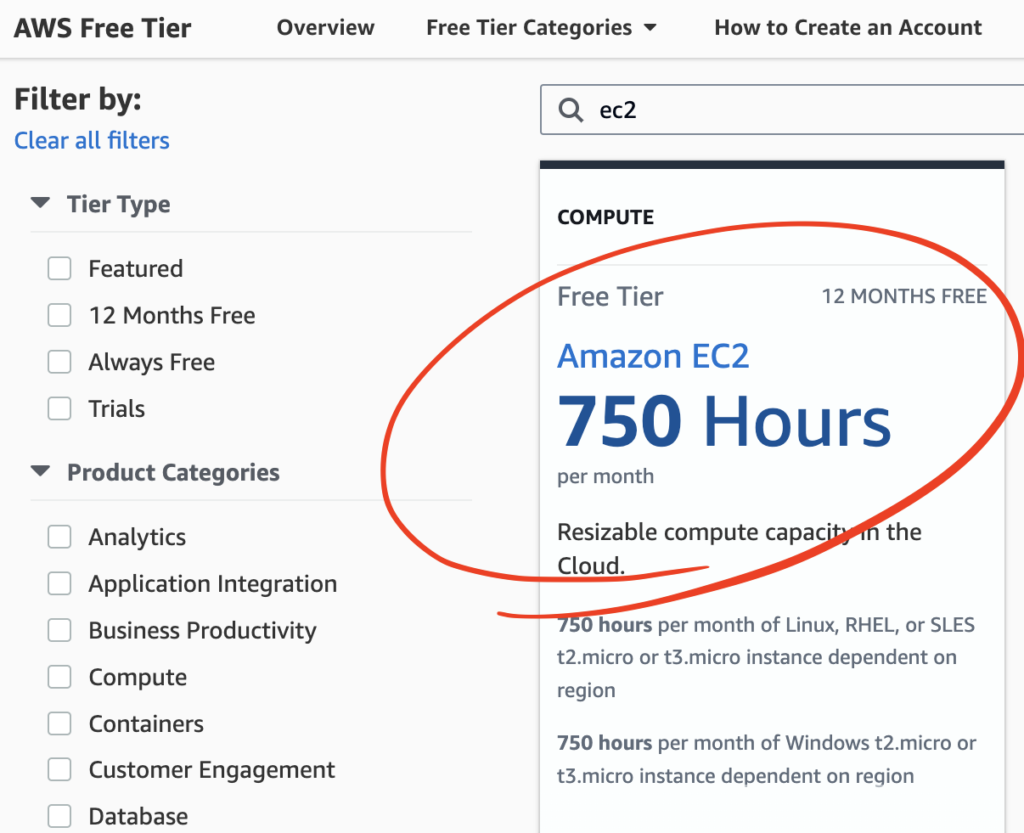
We will start by visiting the AWS portal that catalogs the free-tier services. We will search by EC2 which will show us the AWS EC2 instance free to your service (as shown in Figure 1). The service is free to use for up to 12 months with 750 hours of utilization per month. However, 1 month of utilization will be up to 744 hours maximum (31×24 hours). Therefore it will never reach the monthly threshold.
Figure 1: Amazon EC2 Free Tier Service (Free for 1 Year)
The hardware specifications of the free tier eligible EC2 instance (T2 Micro) are shown in Table 1. The instance size is not significantly large in terms of computational capacity. However, it might be good enough to host a small website or a small web application. You may upgrade the instance to any preferable configuration anytime with a certain cost. Amazon provides different cost plans optimized for your use case.
Table 1: Configuration of the free-tier eligible T2-Micro EC2 instance
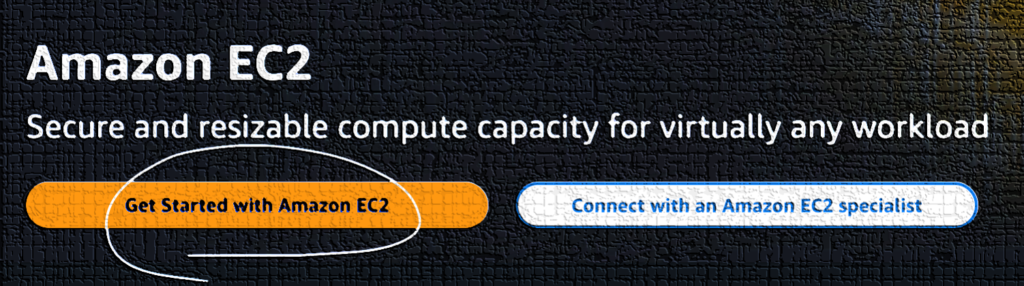
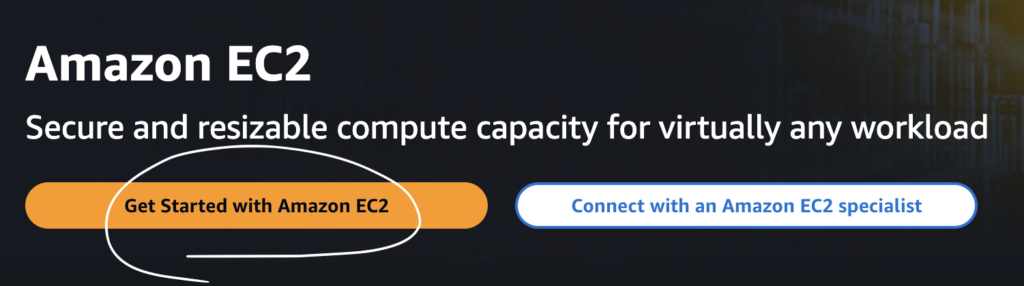
Once Amazon EC2 service is selected from the AWS Free tier page, you will be forwarded to the next page to get started with the service as shown in Figure 2.
Figure 2: Option to Get Started with Amazon EC2
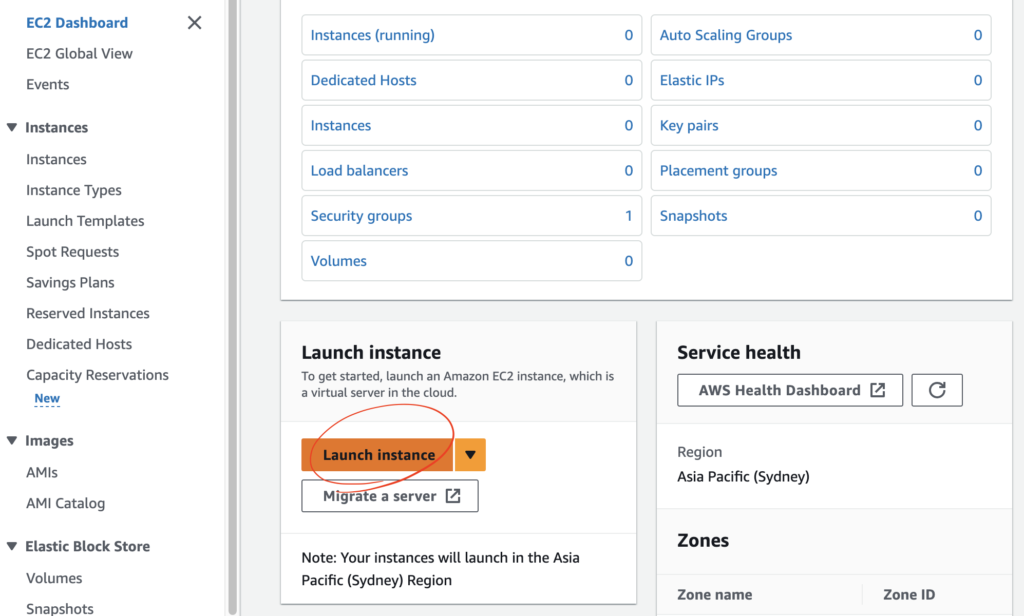
Once you select the get started with Amazon ez2 option, it will take you to the ec2 dashboard. For the first time you will be noticing that there is no instance running. However there will be an option to launch a new instance as shown in figure 3
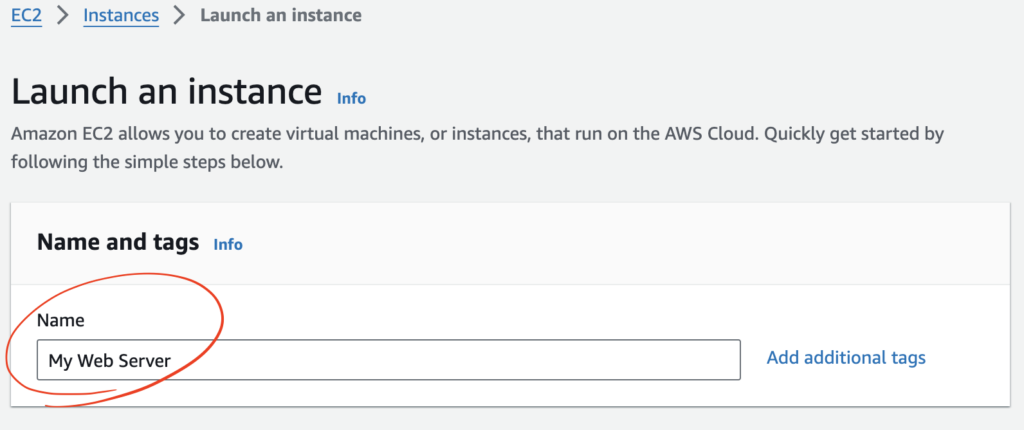
Once the launch instance button is pressed, you will be forwarded to the next page for instance configuration setup. We will start by writing the name of our instance. Give your preferred name as shown in figure 4.
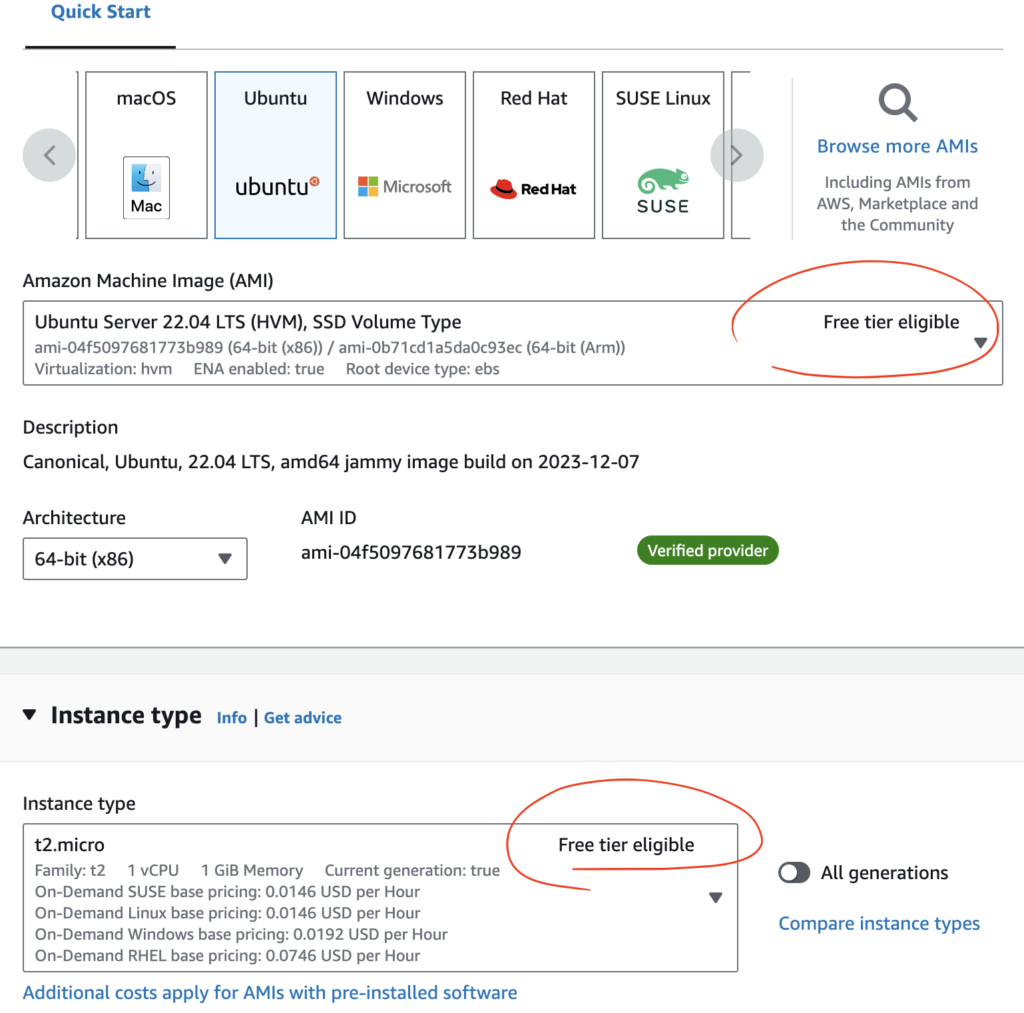
Now from the quick start section, we will be selecting a free-tier eligible Ubuntu image as our operating system (OS) for the instance. The OS images are called Amazon machine image or AMI. We will also be selecting a free trial eligible instance type: t2-micro as shown in figure 5.
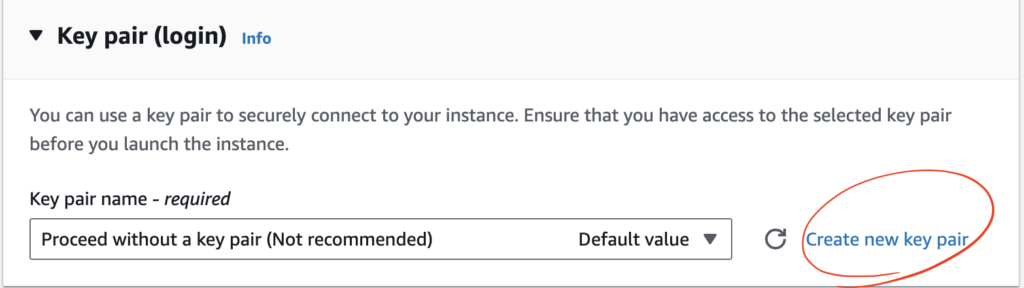
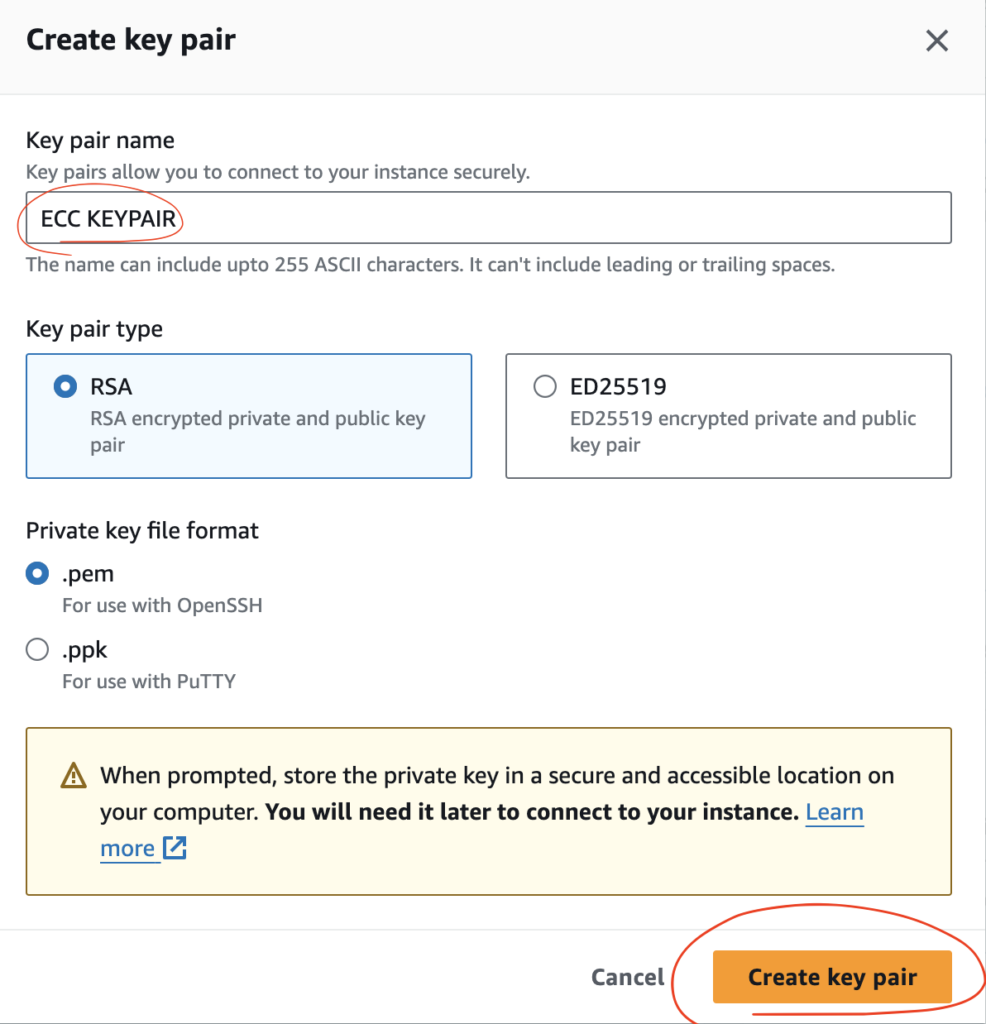
Creating Key pair for Remote SSH
Now we will be creating a new keypad for our instance as shown in Figure 6 and 7. Once create key Pair button is pressed, the RSA encrypted private key will be downloaded to your local system. In the later section of this article, we will be showing how to remotely connect (through SSH) to our EC2 instance using this private key.
Creating Security groups
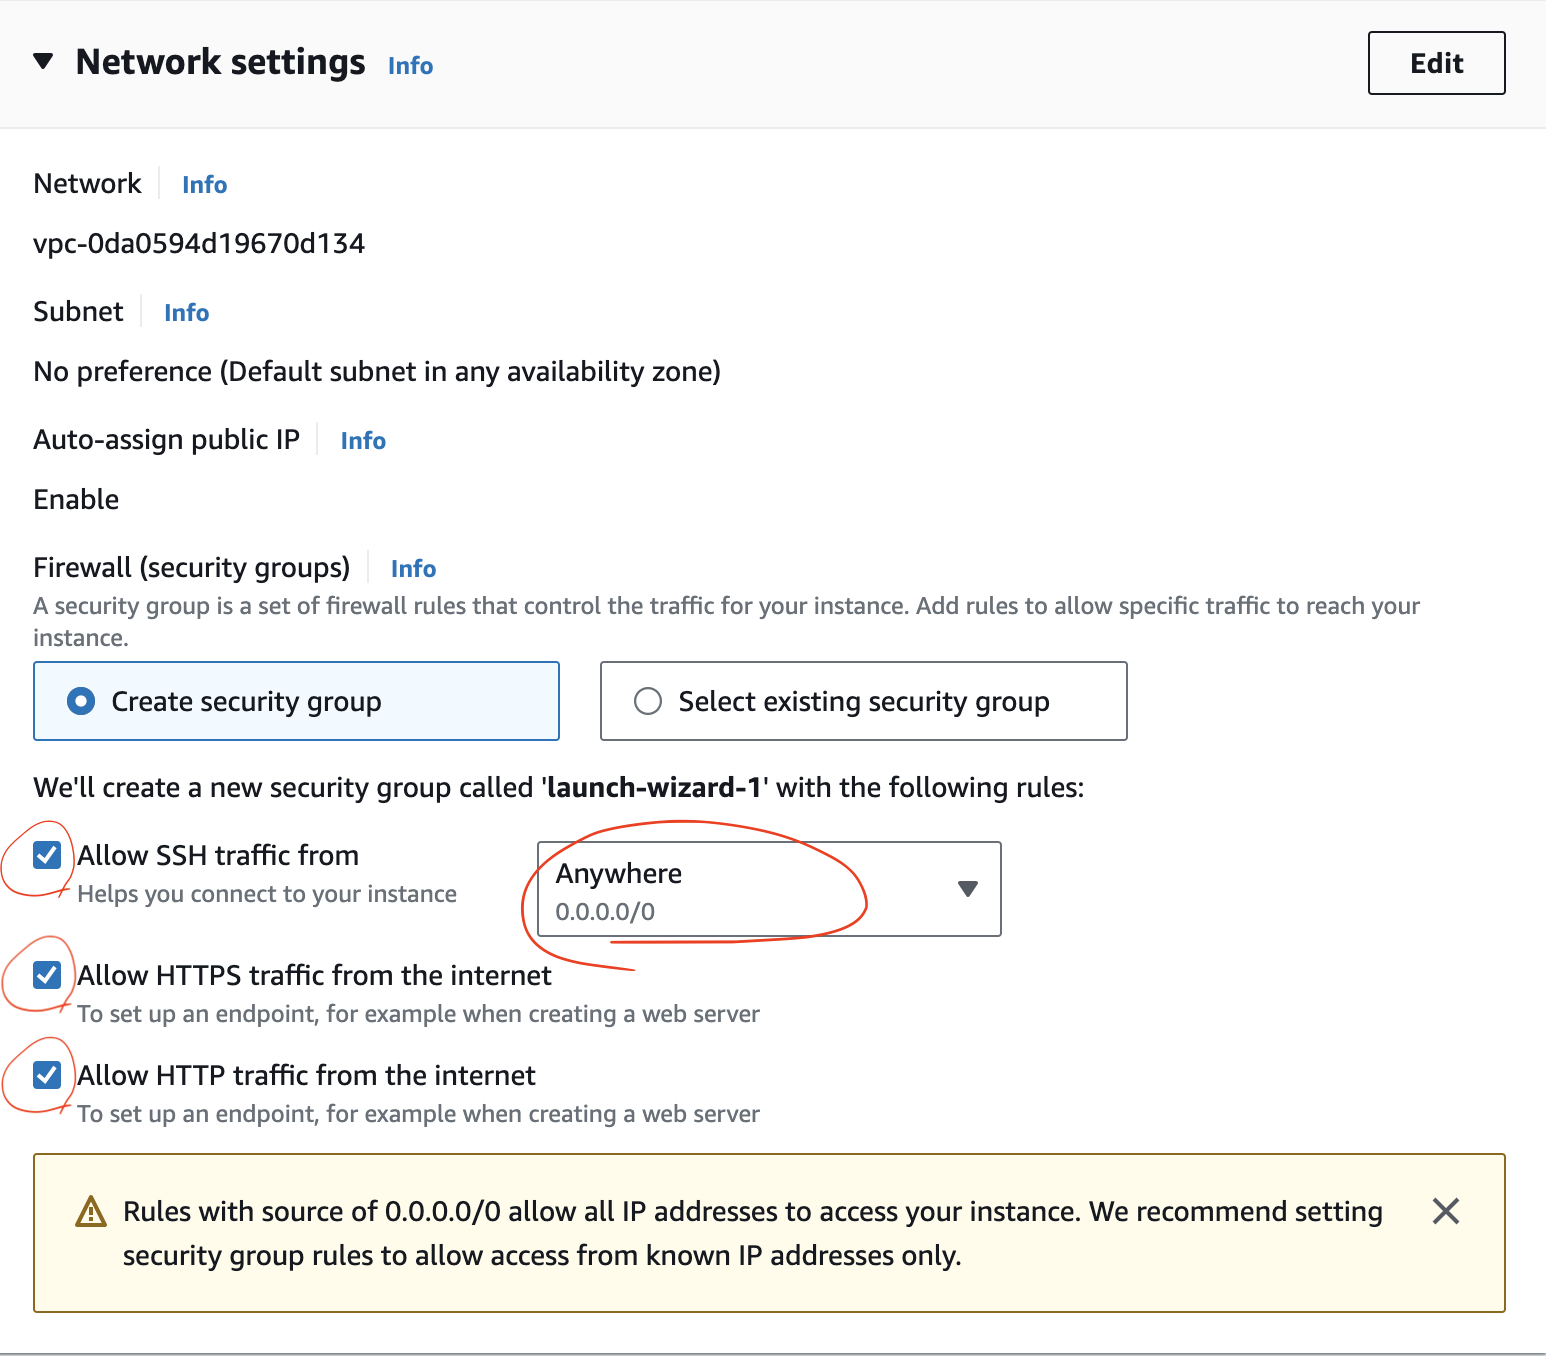
Now we can create the required security groups from the network settings section. There are a couple of things to be considering here. We can allow remote SSH to the EC2 instance from anywhere with the setting shown in Figure 8. However if you just want to allow remote access from your current PC, there is a dedicated option for that (My IP) at the dropdown. The next two options will allow HTTP and HTTPS traffic from internet to your instance which is needed if we want to use the instance for web hosting. So we will be selecting these two options as well.
Configure Storage
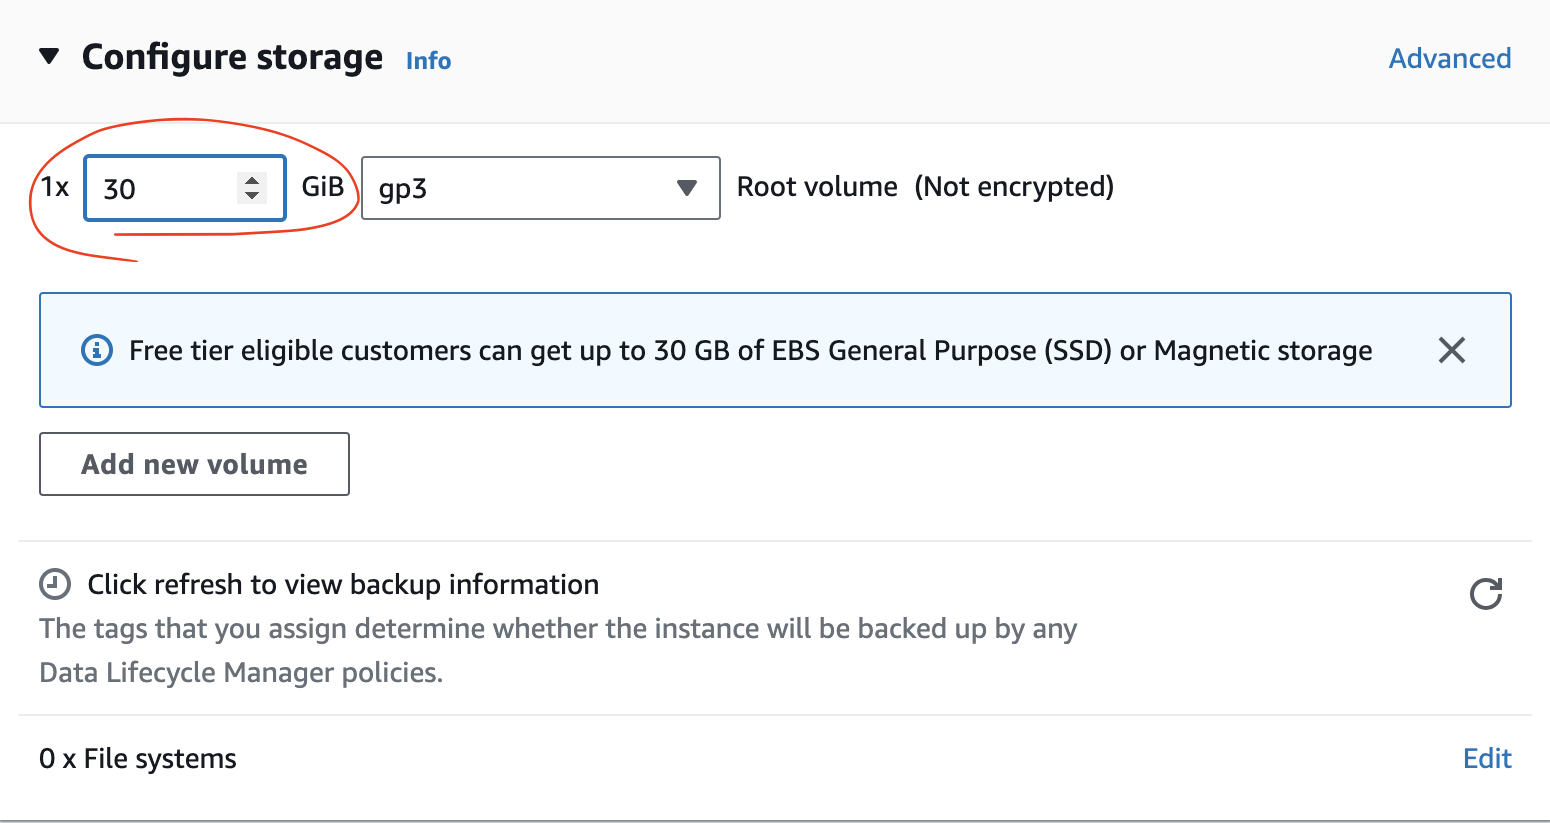
finally we will attach a free tier eligible ABS volume as the storage 2 hour is it to instance by default the size of the ABS volume is set to 8 GB but we can increase it up to 30 GB while still being eligible for free-tier.
Launch Instance
Once all configuration setups are done, you can have a look at the summary and confirm the specs of your EC2 instance and EBS volume (as shown in figure 9). then simply press the launch instance option to start the server.
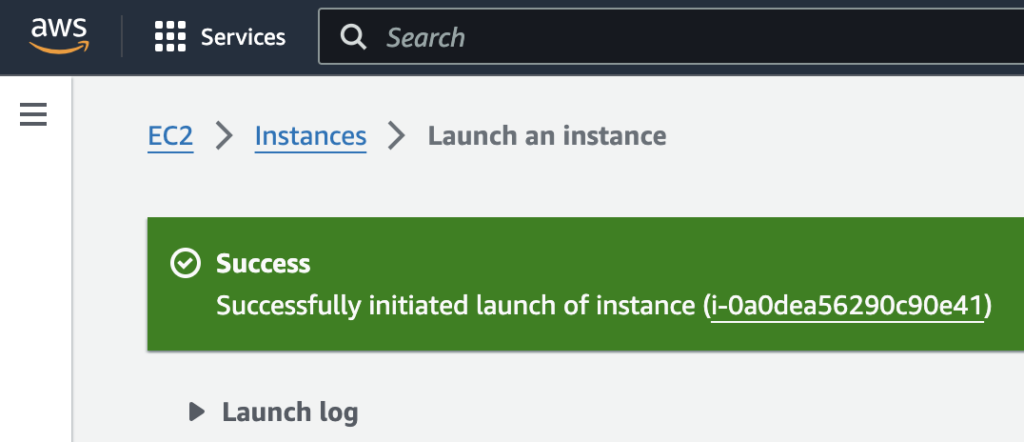
Once the launch instance button is clicked, the success message will be shown (as Figure 10) and the link to your instance will be provided.
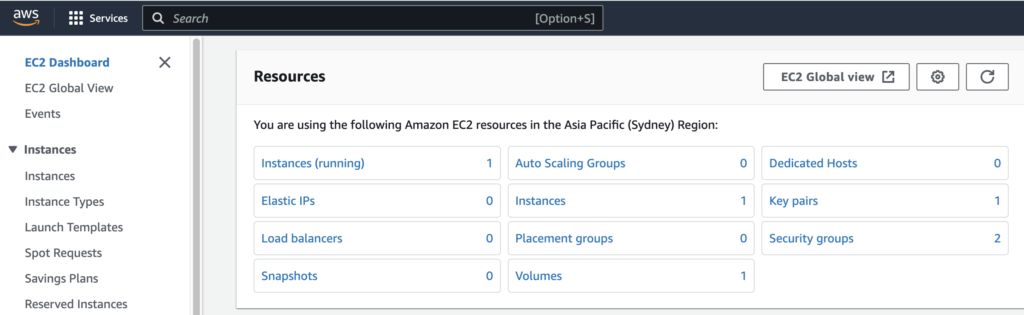
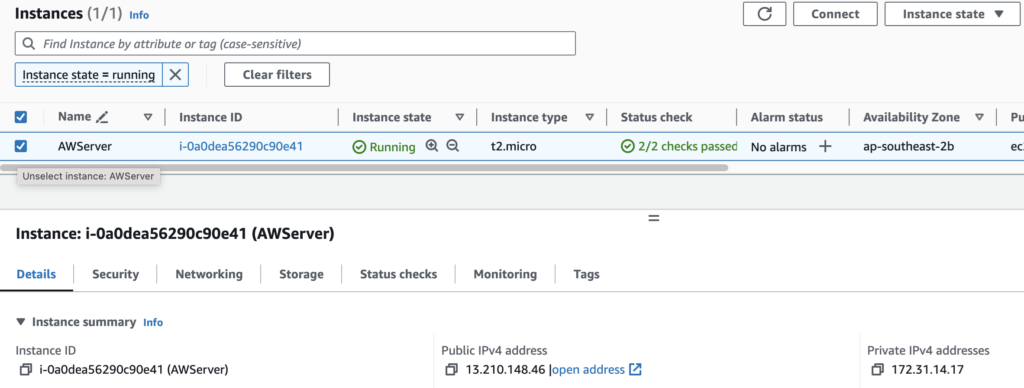
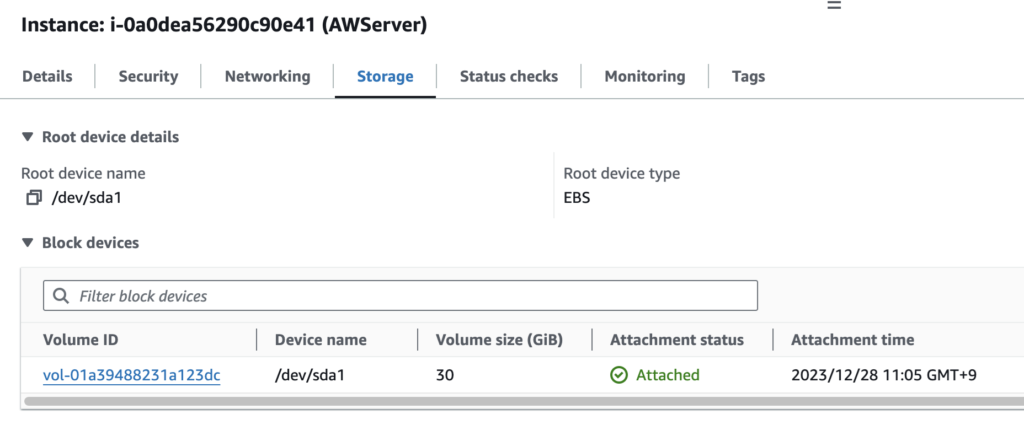
Now the instance will be up and running within couple of seconds. The public IP address of your instance and other essential information will be under the details tab. And the essential information regarding the EBS volume will be under the storage tab (as Figure 11 and 12).
Point your domain to the EC2 instance IP address.
Now you need to point the name server for your domain to the EC2 instance IP address. You can have a domain from your preferred domain service provider. I have received my one from Namecheap. So I will be creating a subdomain there now and point it towards this IP address of the EC2 instance.